
Ok, enough of that and 3 tissues later...because I can't sleep I have decided to show y'all a tutorial this morning. My version of the curling iron/flat iron cover. I love this bag. You can slide your irons in it as soon as you are done...while they are hot...without having to wait for them to cool down. How cool is that? You can do this because you will be using InsulBright Material for the inner "batting".

I used fabric from Home a la mode...you can find the Tangerine Dottie Fabric here, the Ric Rac here, and I used one strip of fabric from our Scrap bags.
To start with: you will need 1-3 coordinating fabrics. InsulBright Material. Fastener, I chose to use a velcro tab, you can use whatever you like. Any type of extra trims you like.
Cut from Fabric
2--18.5" x 6.5" rectangles--if using 2 fabrics cut one from each.
2--14.5" x 6.5" rectangles--if using 2 fabrics cut one from each
2--13.5" x 6.5" rectangles--if using 2 fabrics cut one from each
From the fabric that you want to "trim" the bag with, cut a 2.25" inch strip to make a binding strip. You will fold this piece in half and press.
Cut from InsulBright
1--18" x 6" rectangle
1--14" x 6" rectangle
1--13" x 6" rectangle--I chose to use regular batting for this piece. It is up to you what you use.

Next you will need to make a "sandwich" with your fabric and InsulBright/Batting.

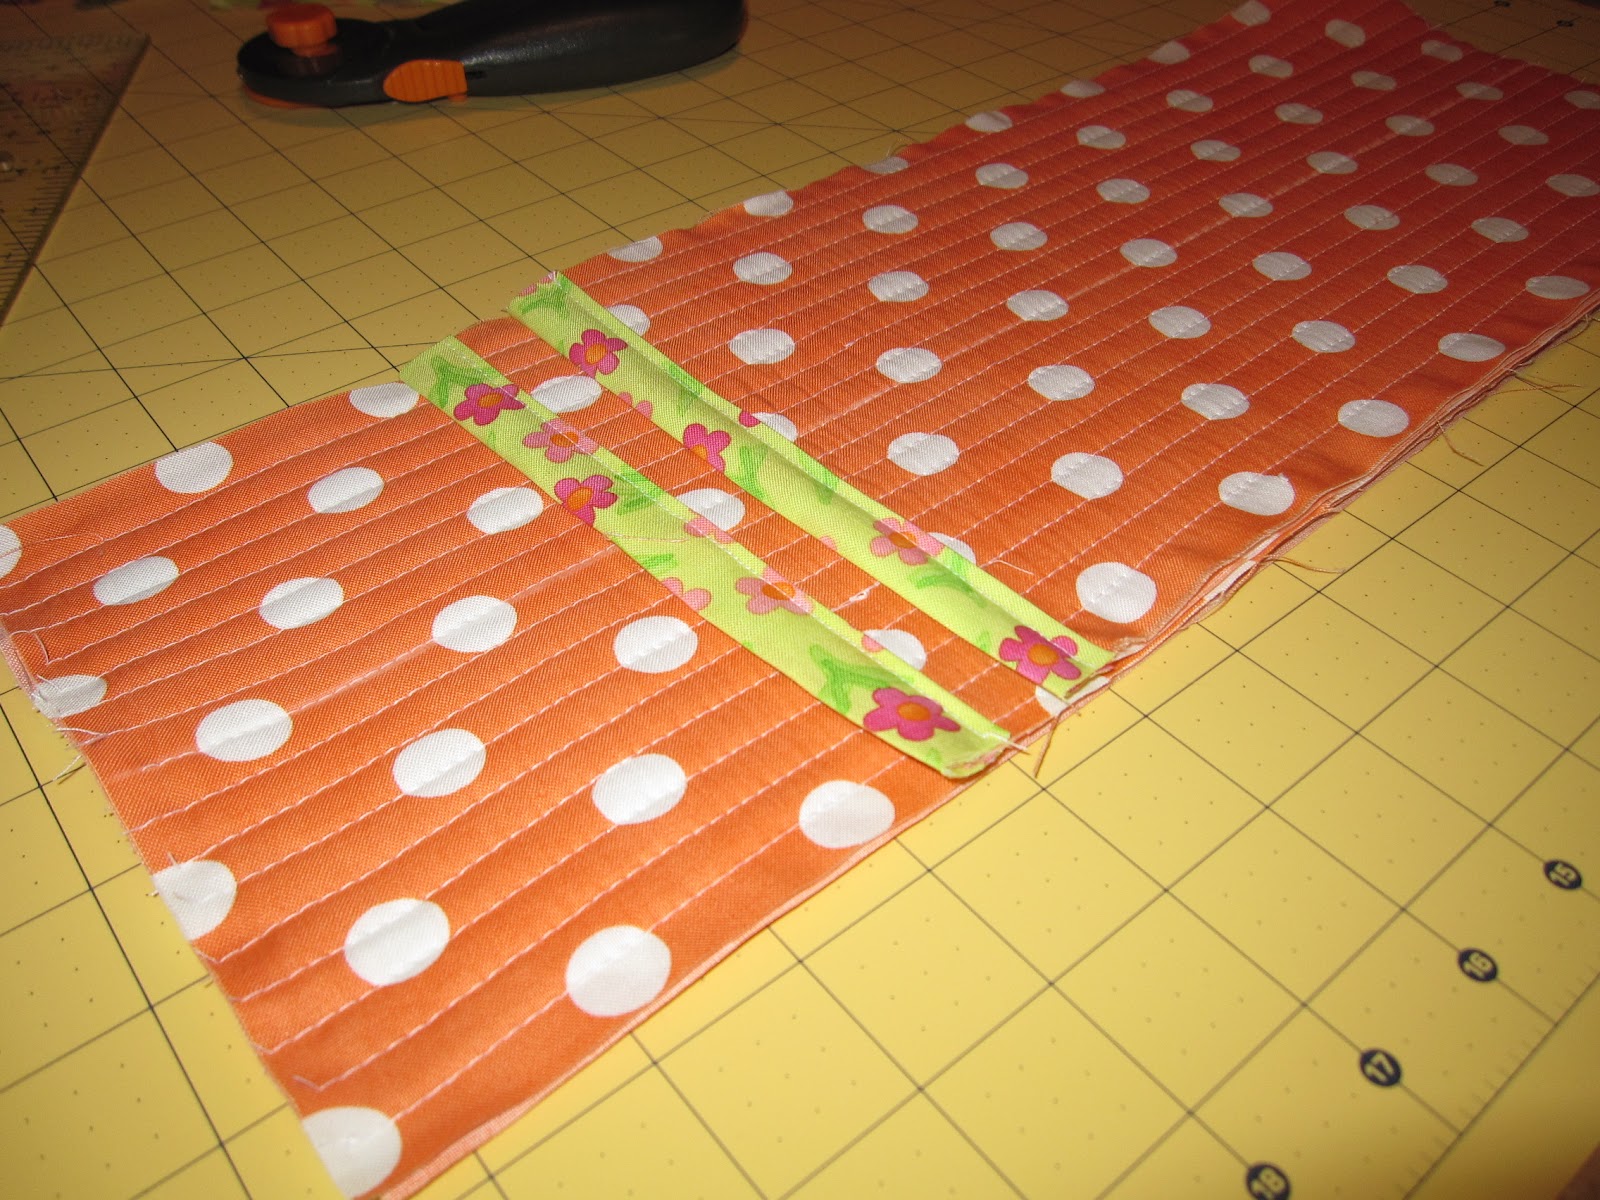
Begin quilting. I chose to go with a straight line stitching. I found the center of my fabric, sewed down that line...then just lined up the edge of my walking foot with the center line and used that as they width of my rows.


Repeat this for all 3 rectangles.
Next you want to put "trim" on the tops of the 14.5" x 6.5" and 13.5"x 6.5" rectangles. Take your trim piece place your raw edge across the top of the rectangle on the 6.5 " in edge and sew using a quarter inch foot. Fold the trim piece over the top of the rectangle then secure it to the back by sewing down the edge as close as you can.

Layer all three rectangles together and sew them together.

Now you want to take your trim piece and attach it to your layered rectangle just like you would quilt binding.

I usually finish binding by hand. I wanted to try using my machine this time. I really like how it turned out.

Now you can add your fastener.

Now just finish up with whatever trims you would like to add. There are so many ways you could "dress" this up or you can just leave it plain and simple. I also wanted to show you a case cover that I made my sister.


Thanks for this tute. This is so cool.
ReplyDeleteThank you for checking it out!
DeleteThank you for your easy to understand tutorial, the pouch is made so perfectly.
ReplyDeleteI will gladly use your tutorial for a nook & ipad cover for the family.
I've made little hessian/sacking pouches with a Moroccan print and frog on a Lilly pad print on for my kids Tracfone LG505C smart phones, so that they don't scratch their touch screens. If the kids just drop the phone on the concrete you will have to buy another phone. The phone cost me $90 but you get triple minutes for life, so that's a money saver.
My sister and I are really into decorating our homes with stencilling, we swap them to save money and it's a great project to do with the kids during the weekend.
I am glad you like it! Thanks for looking at it!
DeleteThanks, Kristin, this tutorial is great! I travel frequently so this is perfect. Sure beats the hand towel I usually wrap my flat iron up in! Congrats to your step-daughter!
ReplyDeleteThank you sooooo much...my sister travels also...she loves her's!
DeleteoH WOW Thanks for the tutorial. Yours is so cute!
ReplyDeleteThank you, Carla
DeleteLoving this - will be making 2 for our home, really great.
ReplyDeleteI would love to see them when you finish them!
DeleteCute idea! How did you attach the velcro closures after the project was assembled? Were the stitches visible on the outside flap?
ReplyDeleteAlex, I just used my machine to attach them. If add the closure to the outer flap before you add your trim, then, it should be able to cover up your stitching and make it not visible.
ReplyDeleteThank you for this great idea with steps showing how to do it! I am new to sewing but going to try to make this for my hot iron! Always afraid it will burn my house down leaving the house when it is still hot! My question is what type of fabric do I need to buy? I wrote down my dimensions so excited to run to joanns. Wanted to know if I could just use any type of fabric or if I should stick with flannel or cotton fabric? Thanks!
ReplyDeleteBrandi. I would stick with cotton. Good Luck!
DeleteThank you so much for getting back to me, I am going to go to Joanns tomorrow and pick out my fabric, so excited to try this! If it looks half way as good as yours I will share! If not I will keep trying as your looks beautiful! Can't wait to sew tomorrow! :-)
DeleteI have a ? for you if you don't mind answering it. When you sandwich the peices together did you use the outside fabric AND the inside fabric? If that makes any sense, like the inside fabric on the bottom and outside fabric on the top. Does the front of it have a pocket too?
ReplyDeleteThe inside and outside fabric should be quilted together. So you are just putting the three pieces of the cover together and sewing them together. when you place the smallest quilted piece on the middle piece it will create a pocket for the front of the cover. Thanks to Kristin's keen memory and sewing talents... she had the answer. Thanks Kristin! Karen
ReplyDeleteI love this! Could you give some more directions on how to finish the binding with your machine?
ReplyDeleteHi! I made your Curling Iron Cover and was going to send you a picture of it, but I am not sure how to do that. No place in the comment section to add a picture.
ReplyDeleteI'm very pleased with the item and will be giving it to my daughter for Christmas.
Sincerely, Helen
Assuming the front pocket is for the cord? If so, does it fit well?
ReplyDeleteI had thought about using a wide piece of elastic before I realized there's an extra pocket here...
I would put cord pocket on backside and also use elastic to help secure the cord.
ReplyDeleteThank you so much for this! I just bought a new flat iron and it's longer than my old one, so of course I'll need a new travel bag. I also love your choice of fabric. So cute!
ReplyDelete