
Ok, enough of that and 3 tissues later...because I can't sleep I have decided to show y'all a tutorial this morning. My version of the curling iron/flat iron cover. I love this bag. You can slide your irons in it as soon as you are done...while they are hot...without having to wait for them to cool down. How cool is that? You can do this because you will be using InsulBright Material for the inner "batting".

I used fabric from Home a la mode...you can find the Tangerine Dottie Fabric here, the Ric Rac here, and I used one strip of fabric from our Scrap bags.
To start with: you will need 1-3 coordinating fabrics. InsulBright Material. Fastener, I chose to use a velcro tab, you can use whatever you like. Any type of extra trims you like.
Cut from Fabric
2--18.5" x 6.5" rectangles--if using 2 fabrics cut one from each.
2--14.5" x 6.5" rectangles--if using 2 fabrics cut one from each
2--13.5" x 6.5" rectangles--if using 2 fabrics cut one from each
From the fabric that you want to "trim" the bag with, cut a 2.25" inch strip to make a binding strip. You will fold this piece in half and press.
Cut from InsulBright
1--18" x 6" rectangle
1--14" x 6" rectangle
1--13" x 6" rectangle--I chose to use regular batting for this piece. It is up to you what you use.

Next you will need to make a "sandwich" with your fabric and InsulBright/Batting.

Begin quilting. I chose to go with a straight line stitching. I found the center of my fabric, sewed down that line...then just lined up the edge of my walking foot with the center line and used that as they width of my rows.


Repeat this for all 3 rectangles.
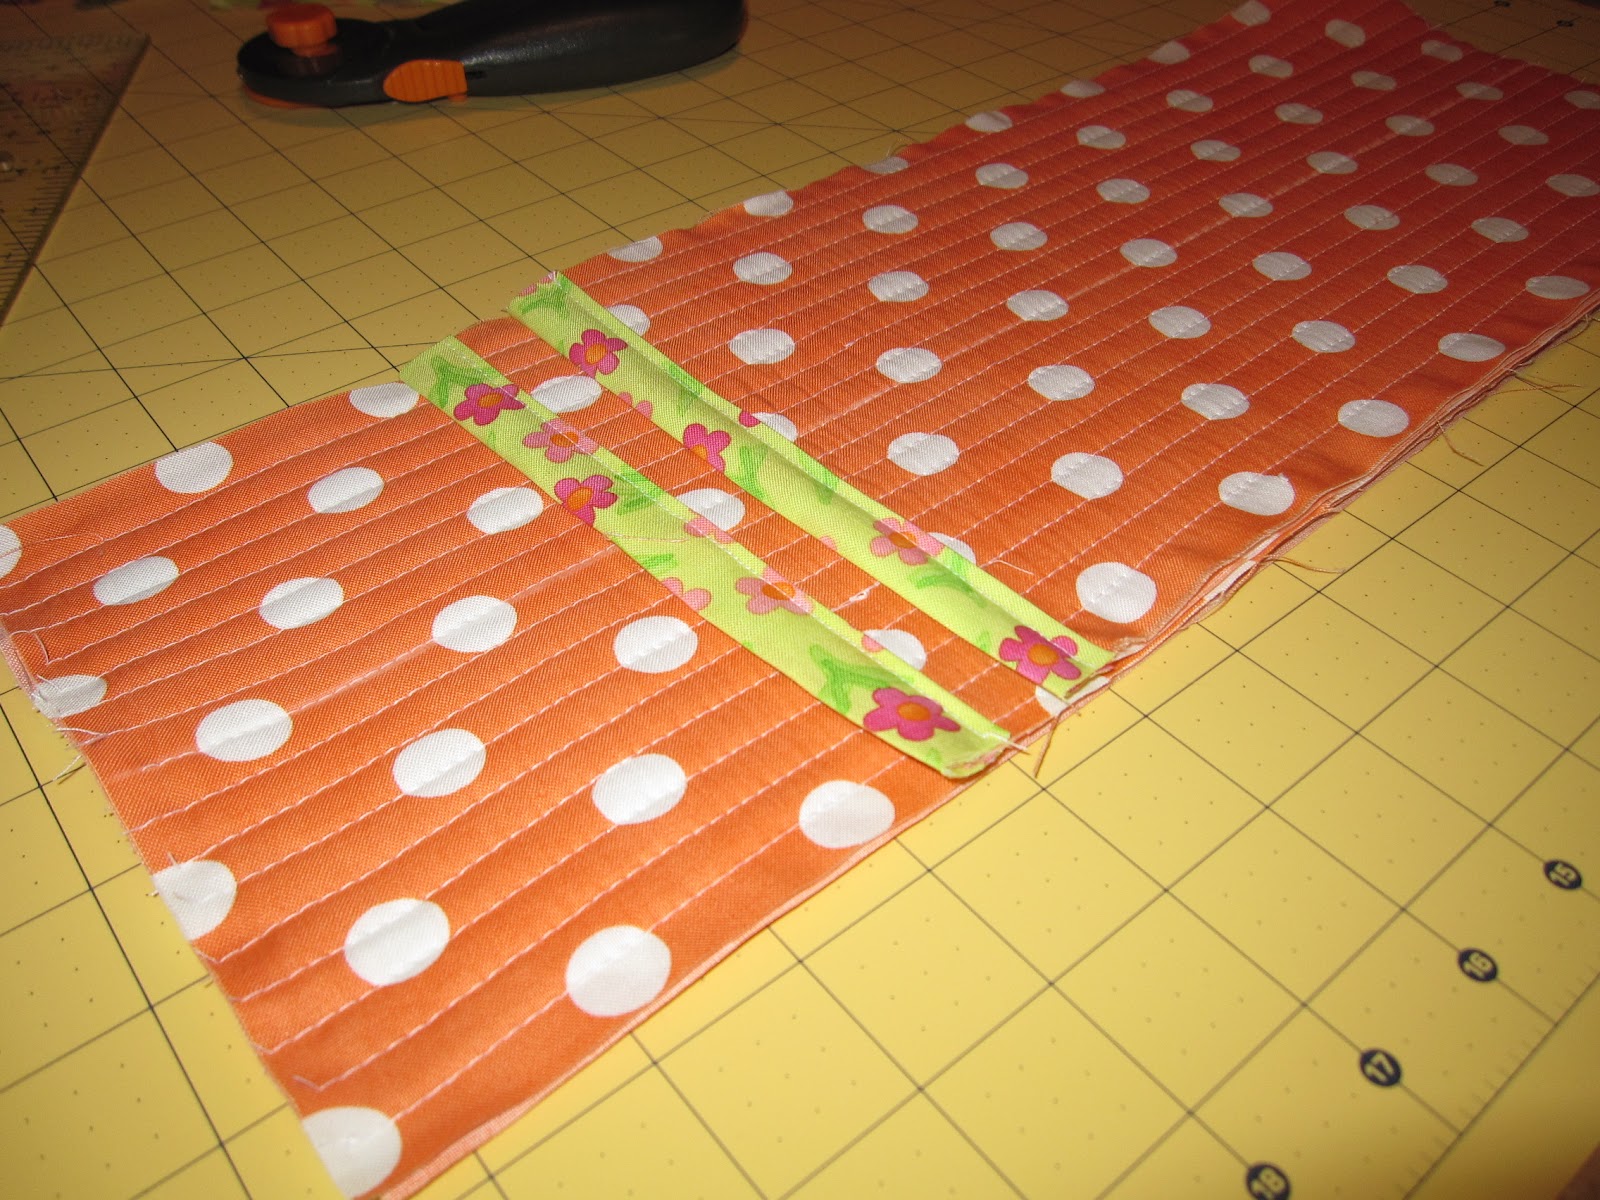
Next you want to put "trim" on the tops of the 14.5" x 6.5" and 13.5"x 6.5" rectangles. Take your trim piece place your raw edge across the top of the rectangle on the 6.5 " in edge and sew using a quarter inch foot. Fold the trim piece over the top of the rectangle then secure it to the back by sewing down the edge as close as you can.

Layer all three rectangles together and sew them together.

Now you want to take your trim piece and attach it to your layered rectangle just like you would quilt binding.

I usually finish binding by hand. I wanted to try using my machine this time. I really like how it turned out.

Now you can add your fastener.

Now just finish up with whatever trims you would like to add. There are so many ways you could "dress" this up or you can just leave it plain and simple. I also wanted to show you a case cover that I made my sister.


