 |
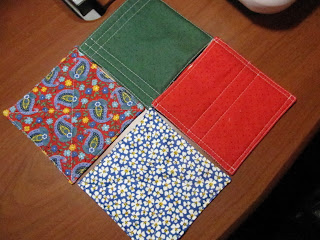
These little cutie coasters are made using 8 pieces of fabric from a charm pack. Layer your pieces in this order: 2 pieces of your fabric right sides facing together then a piece of batting. Sew your layers together using a 1/4" seam. * I used my walking foot just took keep things from slipping. Make sure you leave a 2" opening on one side so you can turn your square right side out.
Cut your four corners on an angle..this will help you have a crisper corner.
Turn your square right side out. Once you have turned your square you will see that your corners are kind of rounded. I am not a big fan of that. I like nice crisp corners so i used the wonderful tool known as the Classic Crystal Point Turner. See how much prettier the corners are now?...I love this tool! I really am not sure how my life existed without it. I use it everytime I am turning items. LOVE LOVE LOVE it. (ok that was my little woohoo for the day :o) ) Now once you have turned everything you will have a small opening.
Press press press. Make sure that your opening sides are lined up. This might take a some negotiations with your iron but you can make it happen.
Now you are are ready to sew around your edge to close the opening. I like to sew as close as possible to the edge so I can make sure to catch all the fabric. Now is also the time to do any kind of quilting you like. I like to vary my quilting. Now you are all done. You can just throw them on your coffee table or tie a ribbon around them and give them as a great Thank You gift. Let's Go Sew! Kristin |
Tuesday, January 17, 2012
Charm Pack Coasters
Hey there! Well, I have decided to try my hand at offering you a simple tutorial.
Labels:
charm pack,
Classic Crystal Point Turner,
coasters,
easy,
fast,
simple,
thank you gift,
Tutorial
Subscribe to:
Post Comments (Atom)


No comments:
Post a Comment